
Integrate LendingPad
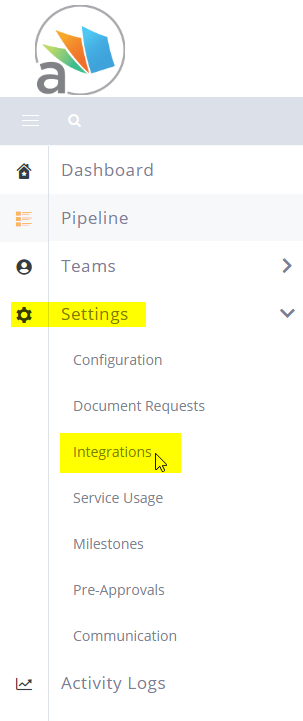
- To get started with the LendingPad Integration, click into the Loanzify POS service and click into the Settings > Integrations.
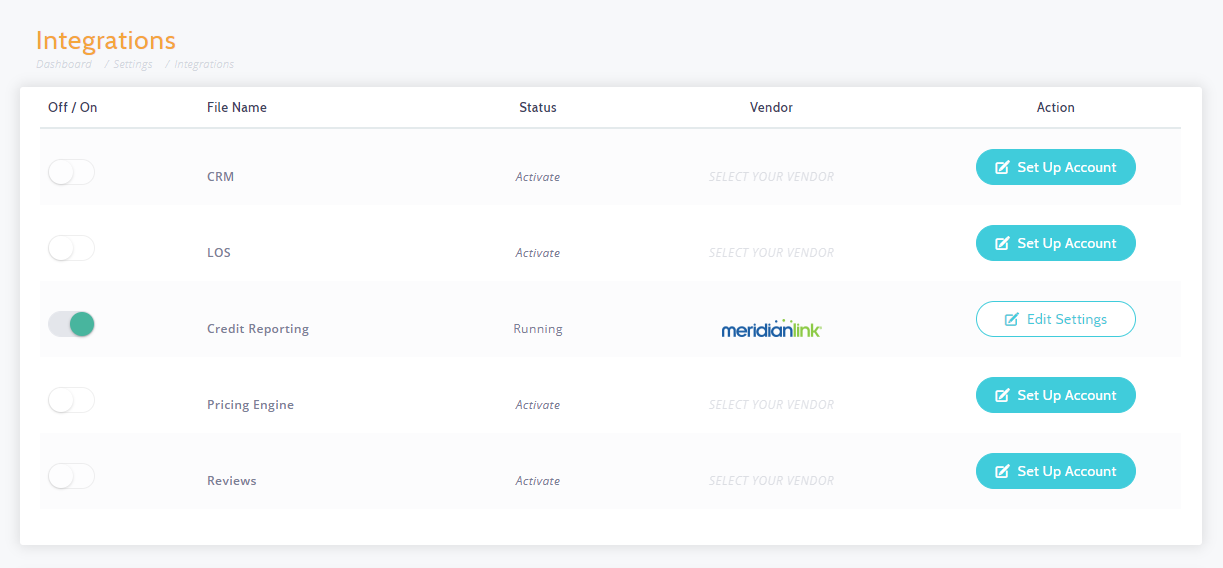
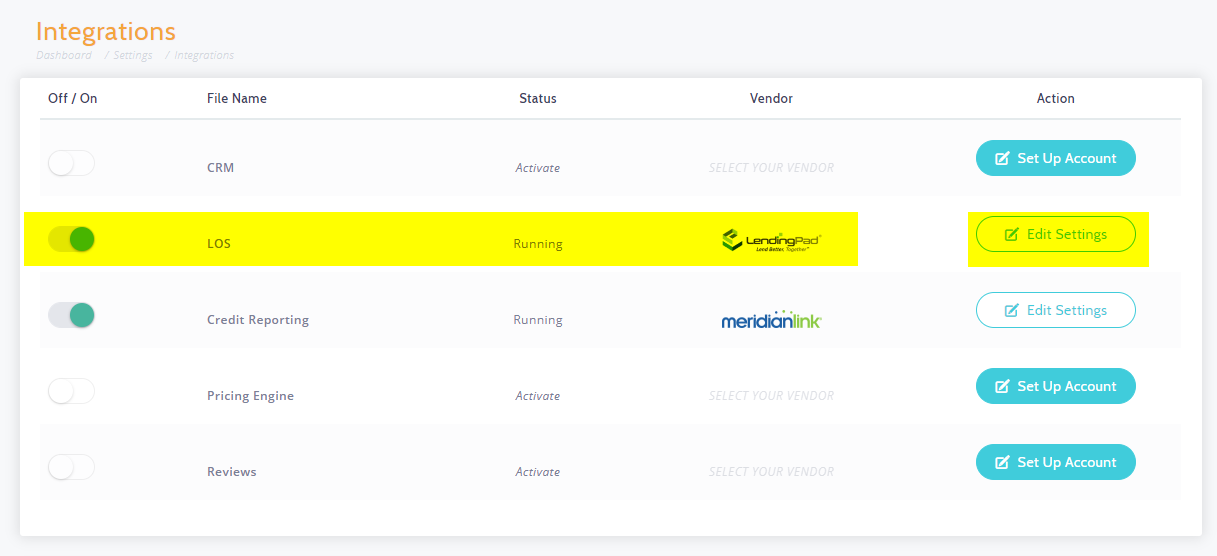
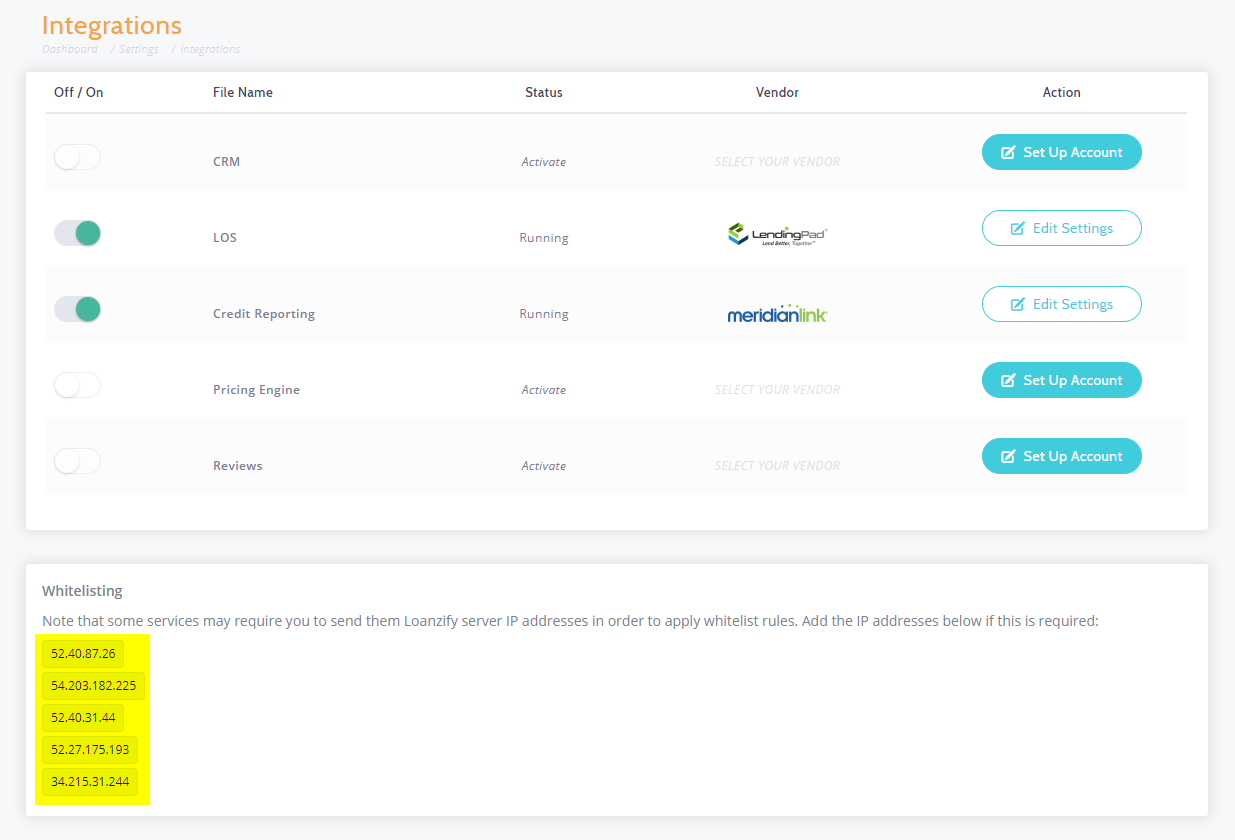
2. You will be presented with the Integrations Dashboard for your Loanzify POS service. You will find a number of integrations in here ranging from CRM, LOS, Credit Reporting, Pricing Engine, Reviews and soon to be more!
In this guide, we will be looking for the LOS section which can be found in the highlighted section below.
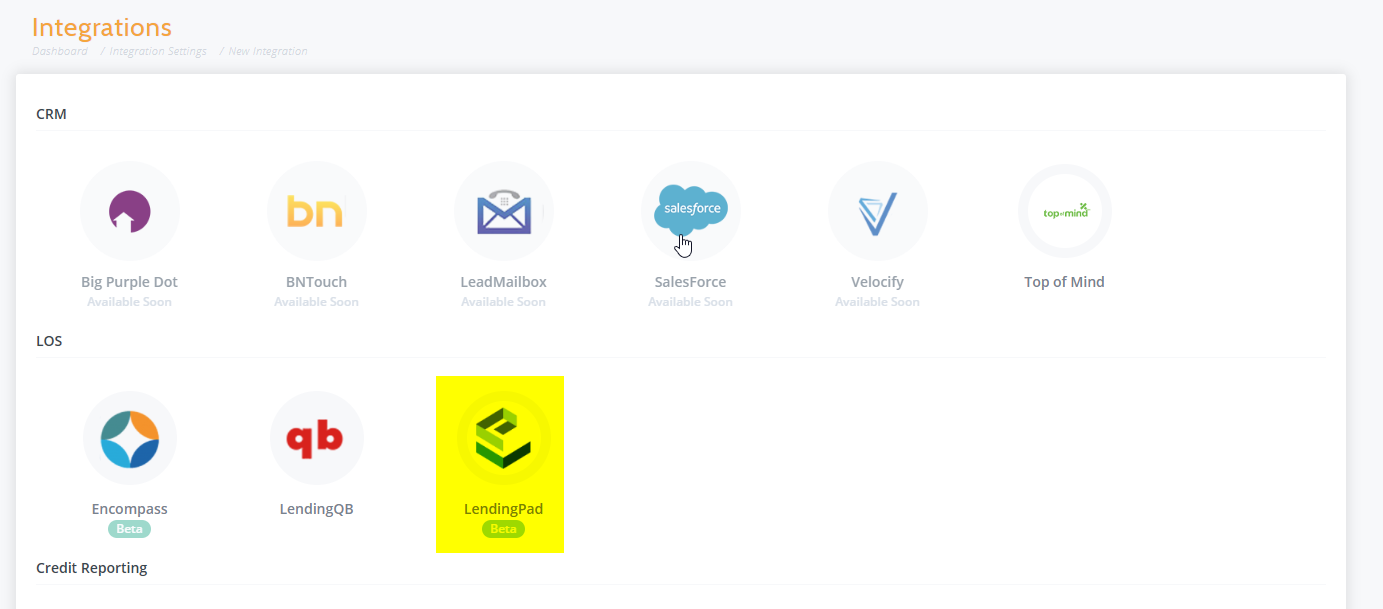
3. Click Set Up Account then look for the LendingPad Integration and click the icon:
4. You will be prompted to enter in necessary information to complete the integration. The details needed here can be provided by your LendingPad representative.
To enable Loan Auto-Posting, you will need to enable the check box. If this account is for testing purposes, you can enable Sandbox Account.
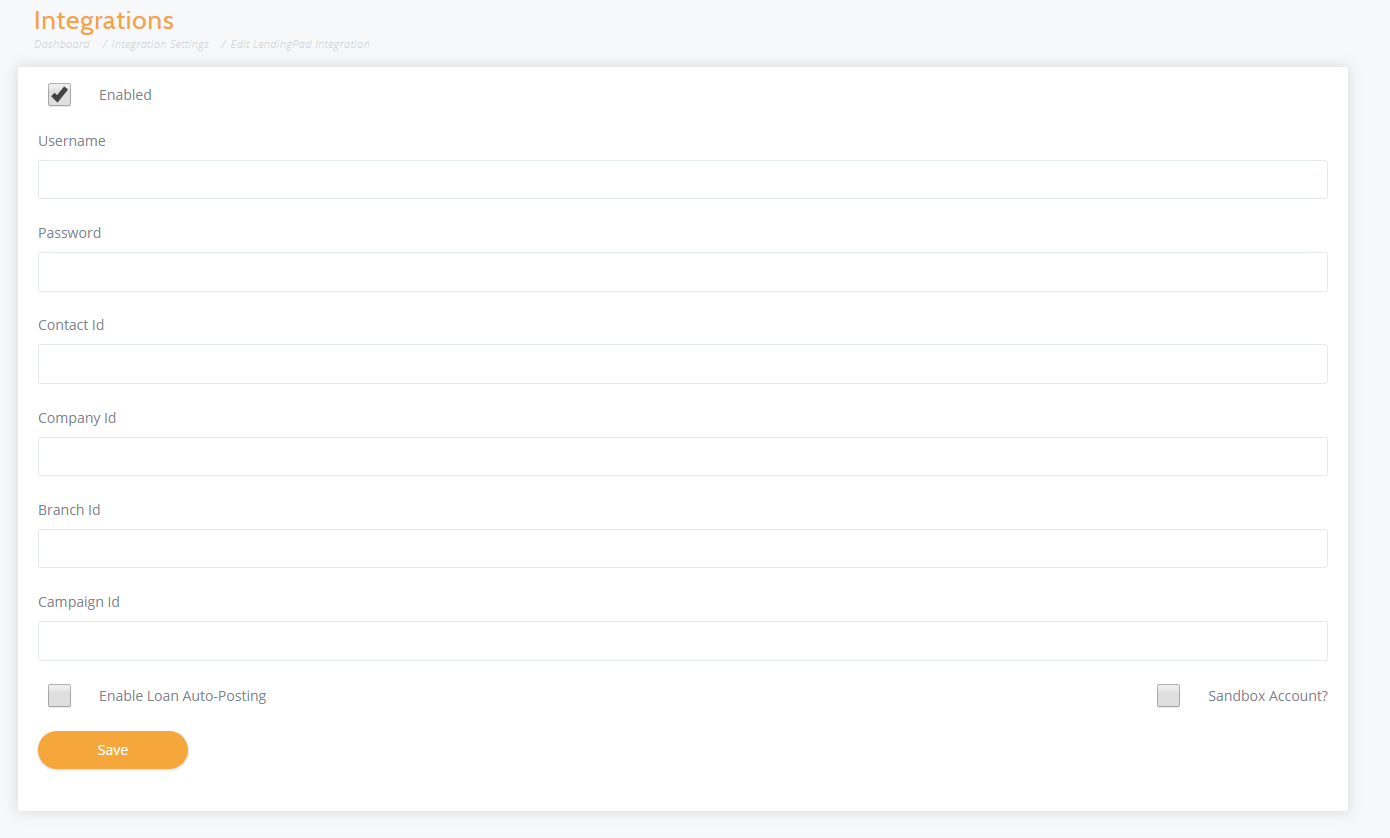
6. Once you have filled in all of the necessary information, click Save and you will be brought to the main Integrations page once again.
This time you will see LendingPad enabled. You can also easily toggle these integrations on and off with the toggle. Revising the details can be accessed from the Edit Settings section.
Important: You will notice Whitelisting IP Addresses at the bottom of your Integrations list. These will be IP Addresses that LendingPad may need to white list if encountering issues.
 Did this answer your question?