Using Text Blocks
Text Blocks are a great feature to have when you need to add the same piece of content to multiple pages on your website. Once you've created a Text Block you can place it in your page content by simply typing or pasting the unique tag within the body of your page, or inside of an editable region if you are using Live Editor.
When the page renders, the tag will be replaced by the text you stored inside of that Text Block.
Example Text Block tag:
%My Text Block%
Create a new Text Block:
- Go to Site Content -> Text Blocks.
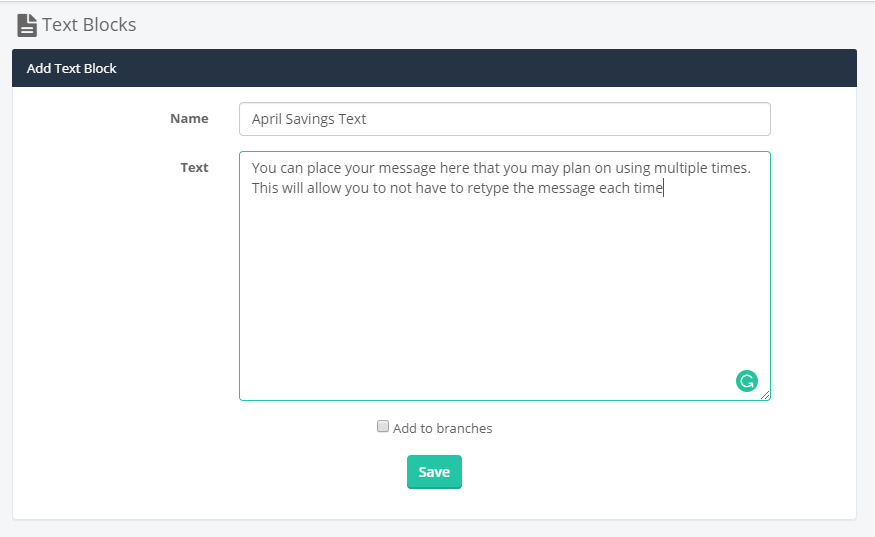
- Type a name for your text block in the name field.
- Type in the text and format it using the toolbar.
- If this will also be used on Branches, then you can enable the check box for "Add to Branch"
- Click "Save".
You will see your new Text Block under Current Text Blocks.
Adding Text Block

List of Current Text Blocks

Edit a Text Block:
- Go to Site Content -> Text Blocks.
- Under Current Text Blocks, find the Text Block you want to edit and click the button with the "pencil" icon.
- Make changes to the Text Block text.
- Click "Save".
- You will notice the Tag for this entry was %AprilSavingsText%. Yours will be different, but tag structure will look the same.

Delete a Text Block:
- Go to Site Content -> Text Blocks.
- Under Current Text Blocks, find the Text Block you want to delete and click the delete button.
- Click "OK" to confirm that you want to delete this Text Block.

Using a text block on a Page
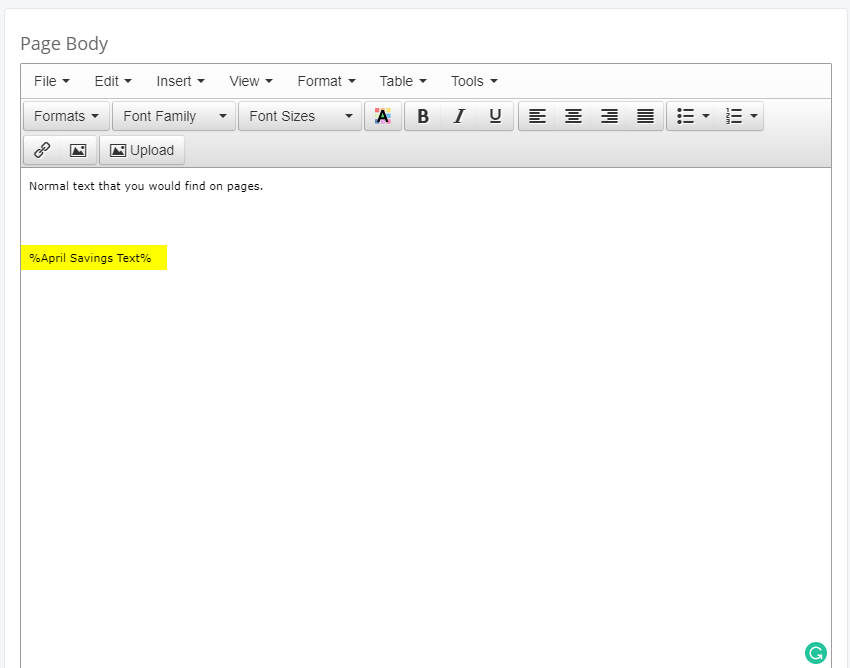
- Once you are within the Editor, or Live Edit feature of a page you can make use of the Text Block Tag
- An example of what this would look like can be seen below. This was using the Example tag discussed earlier. Click Save.

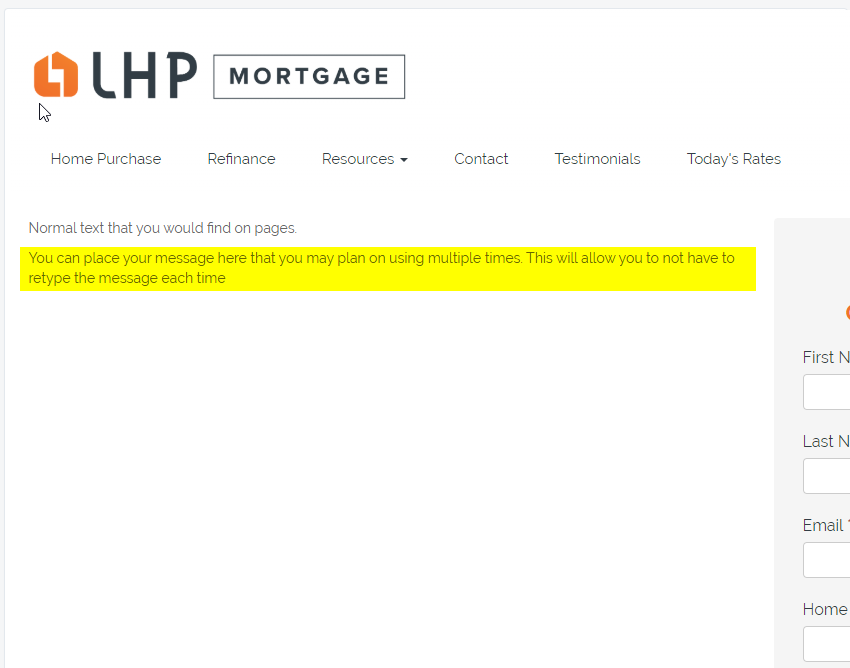
3. Now if you take a look at the web page, you will see the Tag gets converted to the text that you had assigned to the Tag:
In this test case the text I assigned to the Tag was "You can place your message here that you may plan on using multiple times. This will allow you to not have to retype the message each time"

Did this answer your question?
